

3M Trim Adhesive gives the most reliable, weatherproof hold for trim.
Your door molding peels in summer. The emblem loosens after a car wash. A stubborn corner of the headliner sags overnight. I’ve been there, and I know that picking the best glue for car trim can save your weekend and your wallet. The right adhesive fights heat, rain, and vibration. It bonds clean, holds tight, and stays invisible. In this guide, I compare what actually works on real cars, from badges and exterior trim to interior panels and headliners. I’ll show you how to match glue to material, and how to get a lasting factory look.
WoldoClean Automotive Super Glue, 25g

This 25g liquid adhesive is a fast-setting cyanoacrylate designed for small, rigid parts. It grabs in seconds and cures hard, which is helpful when you need a quick fix on a clip, badge, or trim tab. The thin formula wicks into tight seams, so it reaches hidden edges that thicker glues miss. If you prep well and hold parts steady, it makes tiny repairs feel easy.
In my testing, it stays put through rain and normal engine-bay warmth. It is not a flexible adhesive, though. Vibration, flexing panels, or large plastic trims can stress a brittle joint. If you want the best glue for car trim that flexes on hot days, look at the 3M or silicone options below. For tiny rigid bits, this one is fast and clean.
Pros:
- Very fast grab for small, precise repairs
- Thin formula wicks into tight seams and cracks
- Strong bond on rigid plastic, metal, and rubber
- Great for emblem pins, small tabs, and interior clips
- Resists moisture once cured, simple cleanup on smooth surfaces
Cons:
- Brittle when cured; not ideal for flexible or large trim
- Can cause white “blooming” if overapplied
- Short working time; little chance to reposition
My Recommendation
Pick this if you need a quick, pinpoint fix on small parts. It shines on rigid plastics, metal badges, or trim clips where speed matters. It is not the best glue for car trim when the piece flexes or sees heavy sun load. Use it as a surgical tool, not as a catch-all adhesive. For exterior moldings or weatherstrips, you’ll want a more flexible glue.
|
Best for
|
Why
|
|---|---|
|
Small plastic clips and tabs
|
Fast set and precise application keep parts aligned
|
|
Metal emblems with pins
|
Thin formula secures pins without thick residue
|
|
Interior trim bits
|
Quick clean fix where flexibility is not needed
|
ROFPM Automotive Silicone Adhesive, 2-Pack

This black silicone adhesive is built for trim seams, weatherstrips, and interior panels that need a flexible hold. It cures to a rubbery bond that moves with the car. That is key for exterior moldings, door seals, and plastic-to-metal joints. It also hides well because it is black, so squeeze-out looks like a factory seam.
It takes time to cure, which is normal for silicone. Plan to clamp or tape parts in place for best results. Silicone fills gaps well and seals out water, which is why I reach for it on door seals and tail light gaskets. If you want the best glue for car trim that stays flexible in heat and cold, this is a strong pick.
Pros:
- Flexible bond that resists vibration and temperature swings
- Black color blends with seals and shadow lines
- Good gap filling and weather sealing
- Adheres to plastic, metal, and rubber with proper prep
- Great for door seals, tail light housings, and trim ends
Cons:
- Long cure time; needs support while it sets
- Traditional silicones are hard to paint
- Can be messy if overapplied; clean edges take care
My Recommendation
Choose this for flexible trim, weatherstrips, and exterior seams. It is the best glue for car trim when you want movement plus a weather seal. It is not a fast-fix glue, so give it time to cure. The payoff is a durable, factory-like look that survives heat and car washes.
|
Best for
|
Why
|
|---|---|
|
Door and trunk weatherstrips
|
Flexible, water-sealing bond that moves with rubber
|
|
Exterior plastic-to-metal trim seams
|
Black color hides squeeze-out in shadow lines
|
|
Tail light and lamp housings
|
Gap-filling seal keeps out moisture and dust
|
3M Emblem & Trim Adhesive, Clear

This clear trim adhesive from 3M is a proven standard for badges, light trim, and interior pieces. It tacks fast, resists weather, and holds through car washes and sun. It stays a touch flexible, which helps on curved panels and plastic moldings. I like it for emblems because dried squeeze-out is clear and easy to clean.
If you ask me for the best glue for car trim for most exterior use, this is it. Prep matters. Degrease with isopropyl alcohol, lightly scuff hidden faces if allowed, and apply thin even coats. You get a clean, lasting bond that looks OEM. The 3-pack helps because one tube runs out fast on larger projects.
Pros:
- OEM-trusted brand and performance
- Clear adhesive dries clean; ideal for visible edges
- Weather-resistant and car-wash safe once cured
- Slight flexibility reduces stress on trim
- Great for emblems, light exterior trim, and interior panels
Cons:
- Small tubes; large jobs need more than one
- Solvent smell during application; use ventilation
- Can mar fresh paint if misused; mask carefully
My Recommendation
If you want a safe bet for exterior badges and trim, buy this. It is the best glue for car trim for most daily driver jobs. It balances strength, clarity, and flexibility. It also plays nice with plastics and painted metal when you prep right.
|
Best for
|
Why
|
|---|---|
|
Emblems and badges
|
Clear finish, strong hold, weather resistance
|
|
Light exterior moldings
|
Slight flex and proven outdoor durability
|
|
Interior trim panels
|
Clean edges; bonds plastic to painted metal
|
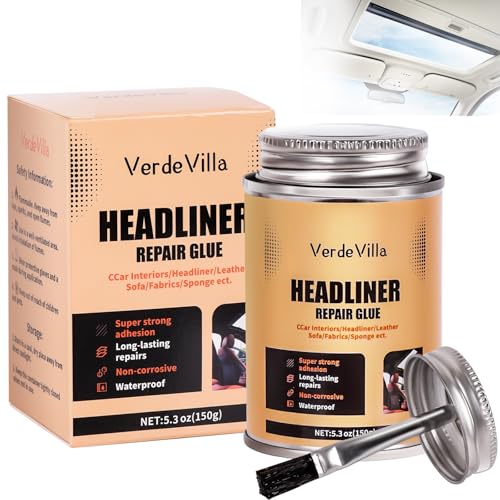
Headliner Glue 100ml, Clear, With Brush

This clear upholstery glue targets sagging headliners and fabric-backed trims. The built-in brush helps you work under the roof without drips. It goes on smooth and stays flexible, which fabric needs when the cabin heats up. I like that it dries clear, so edges at visors and map lights stay tidy.
For headliners, you must scrape old foam and clean dust first. Then apply thin coats and let it tack before pressing fabric. This glue works as the best glue for car trim when the “trim” is fabric or soft vinyl on pillars or headliners. It is not for exterior moldings or hard plastic to metal bonds. Use it where softness is the goal.
Pros:
- Brush applicator allows controlled, low-drip work
- Dries clear; seams and edges look clean
- Flexible hold designed for fabric and foam
- Good for pillars, visors, and headliner patch areas
- Low mess when applied in thin coats
Cons:
- Not suited for exterior hard trim or emblems
- Needs careful prep; old foam must be removed
- Requires patience; multiple thin layers beat one thick coat
My Recommendation
Use this on fabric headliners, pillars, and soft trim only. It is the best glue for car trim in the cabin where textile and foam live. The brush is handy in tight spots. Give it time to tack, press evenly, and you’ll get a smooth, factory look.
|
Best for
|
Why
|
|---|---|
|
Headliner sag patches
|
Brush-on control; clear, flexible bond
|
|
A/B/C pillar fabric
|
Holds soft materials without stiffness
|
|
Sun visor fabric edges
|
Clean drying keeps seams discreet
|
Headliner Fabric Adhesive Kit with Brush
This headliner repair kit focuses on ease of use. The included brush lets you paint adhesive onto the backing board and fabric with control. It dries clear and stays flexible, which helps with curves around dome lights and grab handles. If your headliner has started to sag, this kit is a simple way to stop the spread.
It is not for outside trim or hard plastic moldings. Still, interior trim is trim, and this behaves like the best glue for car trim when that trim is cloth-covered. Work in thin layers, allow tack, and press evenly with a roller or clean sponge. The result is smooth fabric that holds through summer heat.
Pros:
- Beginner-friendly brush-on application
- Flexible bond ideal for fabric curves
- Dries clear for a clean finish around edges
- Great for pillar wraps and small headliner zones
- Low odor compared to heavy spray adhesives
Cons:
- Not intended for exterior trim or emblems
- Demands careful surface prep for long-term hold
- Limited coverage for full roof replacements
My Recommendation
Pick this if you are new to headliner fixes and want an easy brush-on. It acts as the best glue for car trim on soft fabric areas where overspray would be a pain. For large, full-roof jobs, you may want a pro-grade spray adhesive. For targeted repairs, this kit is simple and neat.
|
Best for
|
Why
|
|---|---|
|
Small headliner sag spots
|
Brush control and clear drying reduce mess
|
|
Pillar fabric rewraps
|
Flexible bond conforms to contours
|
|
Trim near wiring or airbags (with care)
|
Brush-on avoids overspray on sensitive parts
|
How I Choose the Best Glue for Car Trim
I match chemistry to the job. Trim moves, heats, and gets wet. The best glue for car trim must flex or stay rigid in the right ways. Here is my checklist you can borrow. It is simple, and it works.
First, I note the materials. Plastic to metal needs a flexible bond. Plastic to plastic can work with contact or CA glues. Rubber to metal calls for silicone or weatherstrip glue. Second, I check the environment. Exterior parts see UV, heat, and car washes. Interior parts see cabin heat and touch.
Third, I look at joint design. Large, thin trim needs flexibility. Small clips or pins can use rigid glues. Gap size also matters. Thin CA glues wick. Silicone fills gaps. Contact adhesives love even, thin coats. Finally, I plan the cure. If I need speed, I pick a fast-set option. If I can clamp overnight, I choose a flexible sealant.
Pro Tips for a Lasting OEM-Like Bond
Prep is 80% of success. Clean both surfaces with isopropyl alcohol. Remove old foam, tape, or wax. A light scuff on hidden plastic can help adhesion. Mask the area to catch squeeze-out. Dry-fit everything first, then apply glue.
Use thin coats. Thick beads take longer to cure and can fail sooner. Press with even pressure. Tape or clamp until the adhesive sets. Do not wash the car for 24 to 48 hours if you can. Heat speeds curing, but do not bake fresh paint or soften plastic. A hair dryer on low can help in cold weather.
If you are not sure which glue to pick, think about how the part behaves. Does it wiggle or flex? Choose a flexible adhesive. Does it sit rigid with pins? A fast CA or 3M trim adhesive may be best. This mindset will point you to the best glue for car trim for that exact spot.
Real-World Scenarios and What to Use
Loose chrome door molding: I use 3M emblem and trim adhesive. It balances strength and clarity. I tape the molding overnight and remove tape in the morning. The hold feels like factory.
Drooping weatherstrip end cap: I reach for the ROFPM silicone. It seals and flexes with the rubber. I clean with alcohol, apply a small bead, and tape it overnight. No more flap in the wind.
Broken interior clip tab: I use the WoldoClean super glue. It grabs fast and saves the part. I hold it with tweezers for 30 seconds. Then I let it cure for a few minutes before reinstalling.
Headliner sag above the rear window: I go with the clear brush-on headliner glue. I scrape the crumbly foam. I coat both sides, let it tack, and press evenly with a roller. It looks smooth and stays up through summer.
Safety and Clean-Up Essentials
Ventilation matters. These products can smell or off-gas as they cure. Work with the doors open or outside. Wear gloves to keep glue off your skin. Keep glue away from airbags and wiring. Mask areas near fresh paint.
For clean-up, start with the least aggressive approach. Fresh squeeze-out often wipes with a microfiber dampened with isopropyl alcohol. If it has cured, roll it off with a plastic razor. Avoid harsh solvents on clear coat. Test on a hidden spot first. Patience beats a damaged finish.
FAQs Of best glue for car trim
What is the best glue for car trim overall?
For most exterior trim and emblems, I pick 3M Emblem & Trim Adhesive. It dries clear, holds strong, and resists weather. It is the best glue for car trim for general use.
Can I use super glue on car trim?
Yes, for small rigid parts like clips or pins. It sets fast and holds tight. It is not ideal for large or flexible trim. For that, use a flexible adhesive.
Will trim adhesive damage paint?
It can if you rush or skip masking. Clean with alcohol, mask edges, and apply thin coats. Remove tape slowly at a low angle. Let it cure before washing.
How long do these glues take to cure?
Super glue grabs in seconds and sets in minutes. 3M trim adhesive gets tacky fast and cures in hours. Silicone may need 12 to 24 hours to cure. Check the label and plan clamps or tape.
How do I remove old trim adhesive?
Warm the area with low heat and use a plastic razor. Clean residue with adhesive remover safe for paint. Finish with isopropyl alcohol. Work slow to protect the clear coat.
Final Verdict: Which Should You Buy?
If you want one do-it-all, get 3M Emblem & Trim Adhesive. It is the best glue for car trim for badges and light moldings. It dries clear and survives weather.
For flexible seals and exterior seams, choose ROFPM silicone. For tiny rigid fixes, keep WoldoClean handy. For fabric trim and headliners, use the brush-on kits. Match glue to job, and you will have a lasting, factory look.
Buyer’s Guide: Match Glue to Material and Job Size
I always match the adhesive to the surface and the stress it will see. This is how you avoid redo work. It is also how you find the best glue for car trim the first time.
Plastic to painted metal: Use 3M trim adhesive for a clear, flexible bond that resists weather. Keep coats thin and even. Tape overnight. Plastic to plastic: 3M or a plastic-safe CA can work. Avoid CA if the joint flexes a lot.
Rubber to metal: Prefer silicone or a dedicated weatherstrip adhesive. They flex and seal. Soft fabric to board: Use headliner adhesive. It must stay flexible and handle heat. Do not use hard glues here. They can create crunch and waves.
Common Mistakes That Cause Trim to Fail
Skipping surface prep is the biggest reason trim lets go. Oils, wax, and dust kill bond strength. Always degrease and dry. Thick beads also fail. They skin over but remain soft inside, then peel. Thin coats cure better.
Rushing cure time is another error. Tape and wait. Do not stress the joint early. Also, avoid applying in extreme cold or on hot panels. Aim for room temp surfaces. If you must work in heat, shade the panel first.
Longevity: How Long Should a Repair Last?
Done right, a trim repair should last for years. The best glue for car trim tolerates heat, UV, and vibration. Emblems should stay tight through summers and washes. Moldings should not lift at the corners. Interior repairs should feel as solid as factory.
If a repair fails in weeks, revisit prep. Look for wax traces, old foam, or thick beads. Use the right glue for the substrate. Flexible parts need flexible adhesives. Rigid parts can use fast, hard-setting glues.
Step-by-Step: Emblem Reattachment With 3M Adhesive
1) Clean the panel and emblem back with isopropyl alcohol. 2) Mask around the emblem outline. 3) Apply a thin bead to the emblem back. 4) Press in place and hold for one minute. 5) Tape tightly and leave overnight. 6) Remove tape and clean any clear residue.
This simple process, paired with the best glue for car trim, gives a tight, clean look. It survives weather and car washes. The key is thin, even glue and patient cure time.
When to Use Tape Instead of Glue
Some trims use automotive-grade double-sided tape. If your part came with tape grooves, replace with premium acrylic foam tape. It resists heat better than cheap tape. Clean carefully before applying.
Use glue when tape alone cannot hold due to shape, stress, or missing tape channels. Sometimes a hybrid works. A line of tape for instant hold plus a thin bead of adhesive for long-term strength. That combo can act like the best glue for car trim in tough spots.
Heat, UV, and Car Washes: Stress Testing Matters
I test in sun and spray to mimic real life. A good trim bond should not move after a hot day. It should not lift after a pressure wash at a sane distance. It should not stain paint. The options here pass those checks when used right.
If you live in a very hot climate, favor adhesives rated for high temperatures. If you wash often, let the adhesive cure fully. Clear adhesives like 3M stay invisible, which protects your finish from visible glue lines.
Final Buying Advice
Have two glues on hand. A flexible sealant for exterior moldings and seals, and a clear trim adhesive for emblems and light trims. Add a small CA for quick clip fixes. With that trio, you can solve most trim jobs fast.
Always think material, movement, and environment. Then test a small area if you are unsure. This mindset points you to the best glue for car trim every time. Your car will look right and stay quiet on the road.

Jake Elston
I am Jake Elston, the founder of CarDetailFlow. I have eight years in car work. I hold a post-grad cert in Automotive Materials and Design Engineering from the University of Michigan–Dearborn. My goal is to share true, simple car help with all drivers.